Even the most casual of coffee fans will have no doubt stumbled upon the Moka Pot at some point. This little coffee contraption is located in virtually every home throughout Italy, and is even commonplace across much of Europe.
Though this brewer is usually associated with espresso, it doesn’t really produce what we might think of as ‘authentic’ espresso. Or at least not the espresso shots that we see in cafes or restaurants. This is because commercial espresso machines use high amounts of pressure to make them,. No wonder they cost upwards of a thousand dollars.
In contrast, moka coffee at low pressure of 1 to 2 pub (100 to 200 kPa), whereas actual espresso coffee takes a strain of 9 pubs (900 kPa). The Moka Pot, on the other hand, uses a very small quantity of pressure and prices under fifty bucks compared to espresso machines.
The Moka Pot functions in the exact same manner as commercial brewers with stress but is not just, but it might come close.
The Moka Pot was made to sit in your stovetop, the water is held by the room, and also the middle filter basket holds your ground coffee, the chamber is wherever your freshly brewed coffee will accumulate. The principle is straightforward. Stress is built up from the chamber, which pushes steam upward and throughout the grounds into the room.
You will need:
- A moka pot
- 20g freshly ground or pre-ground coffee
- Kettle
- Burr coffee grinder
- Coffee scale
The Moka Pot is fairly easy to grasp, and after reading through this brewing manual, I am certain you will be well on your way to creating some fantastic tasting coffee.
Step 1
Preheat The WaterPreheat your own water bring the pot to a boil and then remove from heat.There are lots of Moka Pot brewing aids which will let you know to include cold-water right to a bottom chamber and subsequently heating, I disagree. I advise that you then increase the room and boil your water, this stops the Moka Pot that can cause your java to burn off, which may give a flavor to the coffee. You will be putting your Moka however it requires little time, because of it being pre-warmed.
Step 2
Weigh Your CoffeeNext, you have to weigh your entire coffee beans, you will have enough to fill your filter basket accordingly based on how big your Moka Pot correct so. For my Moka PotI typically utilize 19 g of coffee.
Step 3
Merge Your CoffeeYou will want to grind your bean coffee, After weighed out. Place your coffee grinder into a moderate to nice setting, so your Moka Pot java grind dimensions should resemble dining table salt. It is possible to purchase pre-ground java, the ideal java for Moka Pot I’ve found is your illy Caffe Normale that you are able to locate here.
Step 4
Insert Water Into The Fill LineRequire your water that is boiling and pours in the room and cease in the fill line. If you can’t clearly find a fill line stop under the strain valve situated on the pot’s face.
Step 5
Insert the metallic filter basket, and place it on top of the chamber.
Step 6
Fill The Basket With CoffeeAs soon as your metal filter basket has been added, fill it with your ground coffee (whether it be freshly ground or pre-ground) till it’s level with the very best. Maybe not much, although I love to press back on the coffee, make certain there’s not any coffee round the edges of the rim you won’t find a fantastic seal.Wish to Have a Look at the various Bialetti Espresso Makers? (yes there are unique layouts ) Have a look at this article about the top stovetop espresso makers which showcases an excellent handpicked choice.
Step 7
Build The Moka PotBuild the pot by simply screwing the chamber, not the handle and hold itself to the bud. Be certain there are no reasons on the rim as you start to float.
Step 8
Place Coffee Pot Over HeatNext, put your Moka Brewer be sure that the handle is not over a flame. Attempt to leave the lid open to track the brewing, I say as you could realize that java will begin to splutter attempt.
Step 9
See The Magic Happen! You’ll begin to notice a noise, and you’ll start to observe a flow of java begin to bubble up at the cap. When the shade ceases, along with the bubbling, almost of the coffee begins to get lighter in the shade, remove the kettle.
Step 10
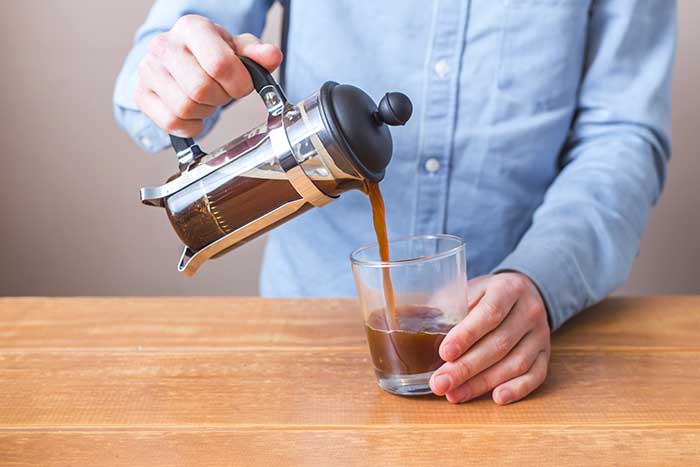
Eliminate And PourPour in your coffee mug being extra careful not to touch the pot with your hands!
Step 11
Clean Up, And Love! Dilute the Moka coffee as I have done with warm water or whether you would rather add lotion, milk, sugar, or additional flavorings based upon your taste.
Stovetop Espresso Maker Brewing Tips
Attempt using a coarser grind if discover that the center metal filter basket clogs or in the event the pressure valve pops out. Make sure not to package the floor the only tap is all it requires.
If you realize your brew time is currently taking 5 minutes, to try turning up the heat to build up tension.
I always advise using whole coffee beans when brewing coffee, but together with all the Moka Pot, you are able to eliminate using pre-ground java made particularly for your Moka coffee manufacturer like this and this kind of java.In case you don’t possess a java scale just fill your alloy filter basket on the very best.