For so many coffee lovers a morning shot of espresso forms an essential part of our day. We’re coffee addicts and we’ve accepted it.
However even for the most robust of coffee fans, investing in an espresso machine can price them out of enjoying that morning fix of caffeine (although there are cheap options out there). With the cost of daily runs to the local coffee shop adding up over the long term, and capsule machines making fairly questionable standards of expresso, it can be easy to feel short of options. Is there another way? How can I make espresso without an espresso machine?
Despite what you might think, there are ways we can do it. I’m here to break down three of them, and show you exactly how you can turn your kitchen into an espresso laboratory.
Learn what you should look out for when buying beans for espresso.
Method #1. Brewing Espresso with a Moka Pot
The moka is a beautiful vintage-like brewing apparatus that matches perfectly with old gas or fire stove tops. Also, it my personal favorite method of brewing espresso, as it creates a cup strong enough to match my tastes as a coffee lover.
If you like a boiling coffee pot in your kitchen, filling the room with beautiful coffee aromas, then this is the method for you.

A moka pot can sometimes take a little bit of time to brew, depending on the amount of water you’ve put in its chamber. However it is absolutely worth the wait.
Moka pots also lend themselves perfectly to espresso because it involves passing hot water through them at very high pressure. This is perfect in contract to French Press, which doesn’t create that type of pressure.
Here’s how to make espresso in a moka.
Step 1: Grind your coffee
The problem with French Press is that it requires coarse grounds, whereas espresso traditionally requires fine grounds. Luckily, with a moka we can grind finely in order to create something much more in line with espresso coffee.
The reason we want fine grounds is that they will force the water coming in at high pressure to flow slowly through the moka. This will ensure that we have high extraction, which is perfect for espresso.
When grinding your coffee, grind it as finely as possible. If you’re using a burr grinder then select a fine setting. If you’re using a blade grinder then pulse your grind until you have reached a consistent fine size.
Step 2: Fill the lower chamber with water
Pour water into your moka chamber. Don’t worry too much about ratios here as your moke will be set up to ensure that the grounds tray and chamber volume match up to produce a good cup of espresso.
If you wish to hurry things along a bit then feel free to preheat your water before pouring it in your moka chamber. Personally, I don’t do this because I want to ensure that my coffee’s extraction is as long as it needs to be, and I worry that adding preheated water might shorten this time.
Step 3: Assemble the moka
Place the coffee tray or basket on top of the water chamber. Once it’s slotted in, add your grounds to it, making sure not to overfill it.
Screw on the upper chamber of your moka. If any grounds obstruct you from doing this correctly or in an airtight manner then simply brush them away.
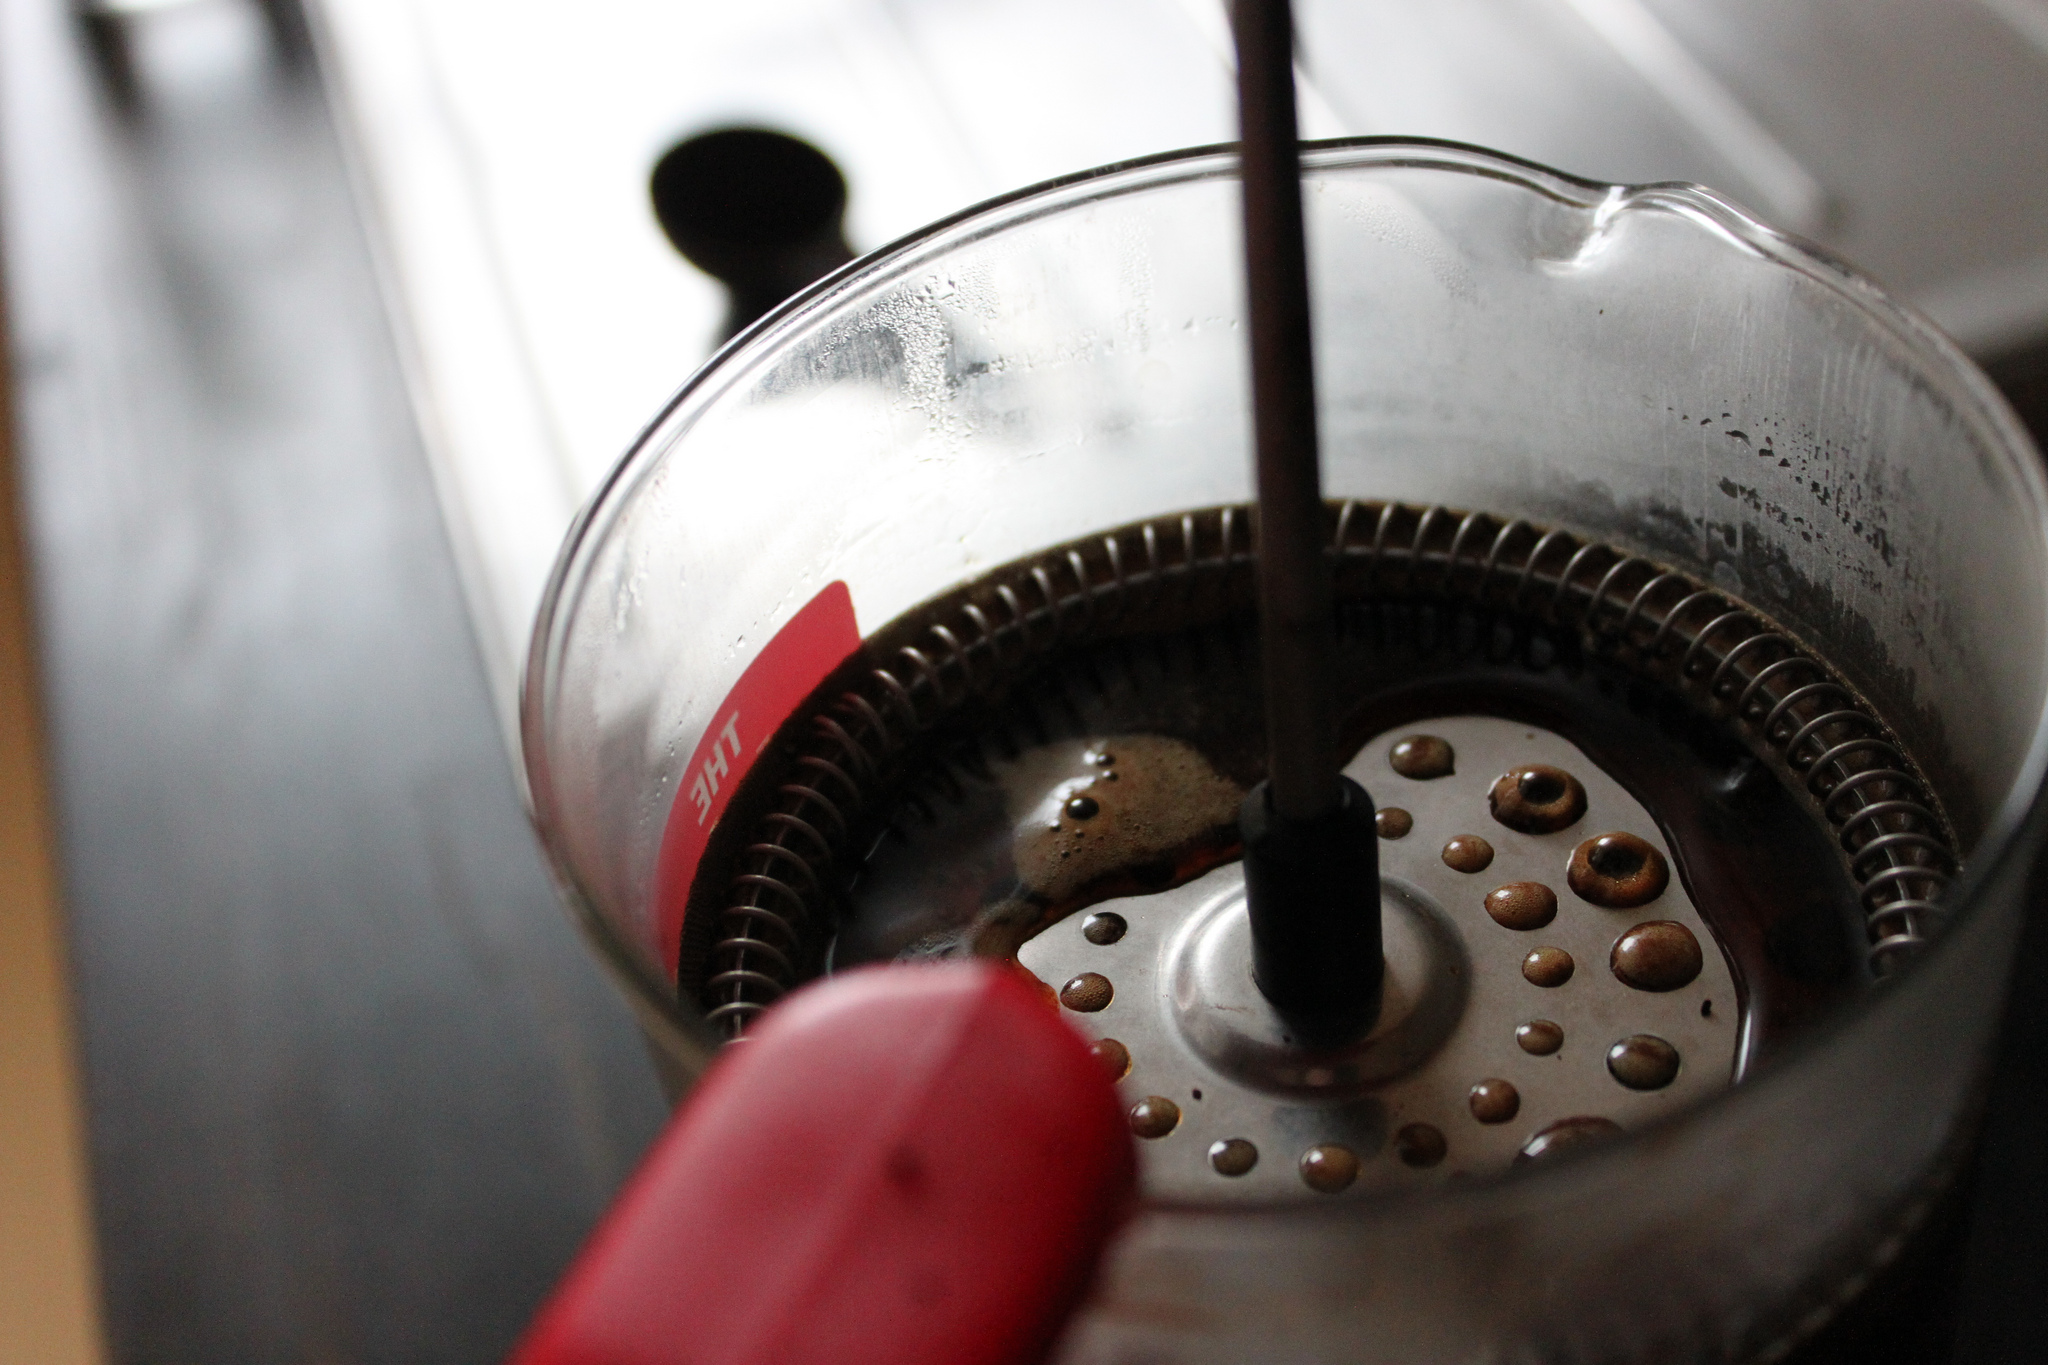
Step 4: Heat it up and serve
It might be tempting here to boil the moka on the highest heat setting, but that will create too much pressure too quickly, not allowing your espresso to extract properly.
Go for a medium heat. It will take a bit longer but will be worth it. If after ten minutes coffee still hasn’t come through the moka’s internal sprout then you can start to slowly increase the heat.
Try to remove the moka from the heat just before it starts to gurgle. This will help reduce the risk of a bitter cup. Pour immediately between your espresso cups.
Step 5: Clean up
Refrain from washing the moka right away. Its metallic surface will take a while to cool down to a safe enough temperature for you to handle.
Once cooled, disassemble it and put the dry espresso grounds in the garbage or bin. Resist using a dishwasher as it can risk staining your moka’s surface.
Method #2. Brewing an Espresso with an Aeropress
Much like with moka, aeropress relies on creating pressure to extract coffee. It’s still relatively new in the coffee world, having only existed since 2005. It’s a relative of the French Press, however is a much more effective method of creating pressure in the coffee bed.
It’s a cylindrical in shape and sits above the coffee cup. It has a filter at the end to house the coffee, and the water starts within the cylinder. As you push down on it, the hot water flows slowly at high pressure through the coffee grounds.
So how do we create espresso with it?
Step 1: Grind your coffee
Just like with moka we need our grounds to be fine. For the same reason, we need the grounds to create a slow flow rate as the water is passed through at high pressure. If our grounds are too coarse then the water will flow too slowly through them and under extract your coffee. You’ll basically end up with a cup of weak coffee-flavored water.
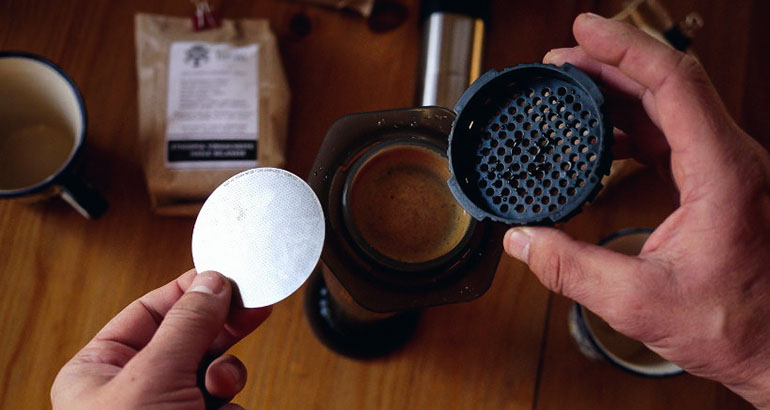
Step 2: Apply your grounds
Prepare the aeropress with filter paper in the filter cap. Pre-wet the filter with water to help rinse away any dust or bleach-like taste from the paper. We do this exact same pre-wetting with filter paper for V60 pour over.
Add the grounds to the aeropress and give it a tap to even them out. Add a second filter paper at the end of the plunger cylinder so that your grounds are sandwiched between two filter papers. This will help keep the grounds at the end of the tube.
Step 3: Press the plunger
Before adding any water, apply pressure to the plunger and slowly press down. Once you reach bottom, retract the cylinder back to the top. If the grounds are in a neat puck-like shape then you’re good to go.
Step 4: Add water and serve
Boil your water. Once boiled, add immediately to your aeropress and follow the volume guides marked on the side of your aeropress to determine how much you need to add.
Press the plunger down again slowly. You’ll be met with noticeably more resistance on account of the water in the aeropress, so push down and extract slowly.
Unlike with French Press, what you won’t need to do here is let the grounds steep, so you can enjoy your espresso much sooner.
#3. Brewing an Espresso with a French Press
OK, I’m fully aware that I’m going to upset a few people here.
Their places in so many kitchens is testament to the brewer’s popularity and ease of use. They’re perhaps the cheapest type of coffee brewing device that you can get, with the smaller varieties starting at the price of a couple of cups of coffee, building up as you choose bigger models
If you’re unfamiliar with them, they’re unmistakable: They’re essentially a glass thermos container that has a plunger at its head, which you press down to brew the coffee.
There’s nothing complicated to it, but often coffee doesn’t need to be. And here we can leverage it to brew espresso.
Step 1: Grind your espresso coffee for french press
While espresso grounds are traditionally fine, for French Press we need to take a different approach. Fine grounds in French Press risk making your coffee cloggy and muddy, and you’ll even find a bed of muddy coffee at the bottom of your cup. So instead we need to make use of coarse grounds to remedy this. These will be much easier to control with the plunger of your French Press, pushing them to the bottom of the carafe and keeping them filtered out of your coffee.
The key difference here will be that we want to increase our concentration of coffee to water. So instead of one tablespoon of coffee per cup, we want to have two tablespoons of coffee per cup of espresso. Because of the nature of French Press brewing, you’ll want to make at least four cups of espresso for this brewing method to be worth it.
Put your measured coffee in the carafe in preparation for the water.
Step 2: Boil the water
I’ve written on here before about the importance of water temperature for all brewing methods, but it’s particularly key with espresso. The reason for this is that it needs a high water temperature to aid its extraction (the way in which coffee solubles and aromas are drawn out of the coffee bean). With its dark and intense flavors, espresso is obviously a type of coffee that needs good extraction. If coffee is under extracted then it’ll taste sour and weak, and if your water is only lukewarm then you risk under extraction.
Be sure to boil your water immediately before pouring it into the carafe of your French Press.
Step 3: Blooming
This is a key step that is also used in pour over methods, and is key to good coffee extraction. Pour just enough water to cover the very top layer of your coffee grounds and then leave for 30 seconds. This is called blooming.
What this step does is allow carbon dioxide to escape the grounds, making them more permeable. This means that when we add the remainder of our water, it can flow more freely through the grounds, extracting them more effectively. In short, this gives you a more flavorful, aromatic cup of coffee.
Step 4: Finishing off the water
Add the remainder of your water. Stir gently so that the particles mix more effectively. Don’t be too aggressive with your stirring; we only want to create a slow stir in the carafe to help aid extraction.
Step 5: Steep the coffee
This step could make or break your coffee, so you need to be precise with how you measure your time here. For our purposes with espresso here we have to let the grounds steep for exactly 4 minutes. Anything under will under extract the grounds and tasting weak and sour, and anything over will leave them over extracted, tasting bitter.
Step 6: Use the plunger
It’s important to be gentle here. Don’t press the plunger down in one fast, hard motion. Instead, do it in a slow and steady action. If at any point the resistance halts the plunger, then just retract it very slightly before continuing to press it down.
Step 7: Serve up
As soon as your plunger reaches the foot of the carafe, pour your espresso immediately. If you wait any longer your coffee might turn bitter.
What Makes a Great Espresso?
There are a few other things you need to learn to control in order to deliver a great cup of espresso. Brewing device does play a role, but here are some other coffee extraction variables that you need to consider when making it.
Let’s start at the very beginning with beans. While you can buy preg-round espresso grounds at the store, I’d always recommend against it. Yes they’re convenient and easy, but they just won’t have that freshness that we really want from a cup of espresso. Beans age quickly the moment they’re ground, so if you have them ground from a pack then they’ll be stale and dull. Always buy in bean form and grind at home.
As you can probably tell from two of our methods above, pressure really is key with espresso. That’s why the moka pot is so great and is the method out of the three above that I’d choose. It generates huge pressure that helps result in a very authentic tasting espresso.
Water temperature is also key. The higher the water temperature, the more turbulent the water will be, which directly correlates with extraction rate. Basically, if your water is too cool then your coffee will be weak, and if your water is too hot then it will be too bitter. If you’re using an aeropress or french press, try to use water at around 195 degrees fahrenheit.
Bean roast level is also important. Contrary to what you might think, light roasts actually contain more caffeine than dark, so go light if you like more of a kick to your coffee. If you like something a little more subtle but with a more bitter taste, go dark.